
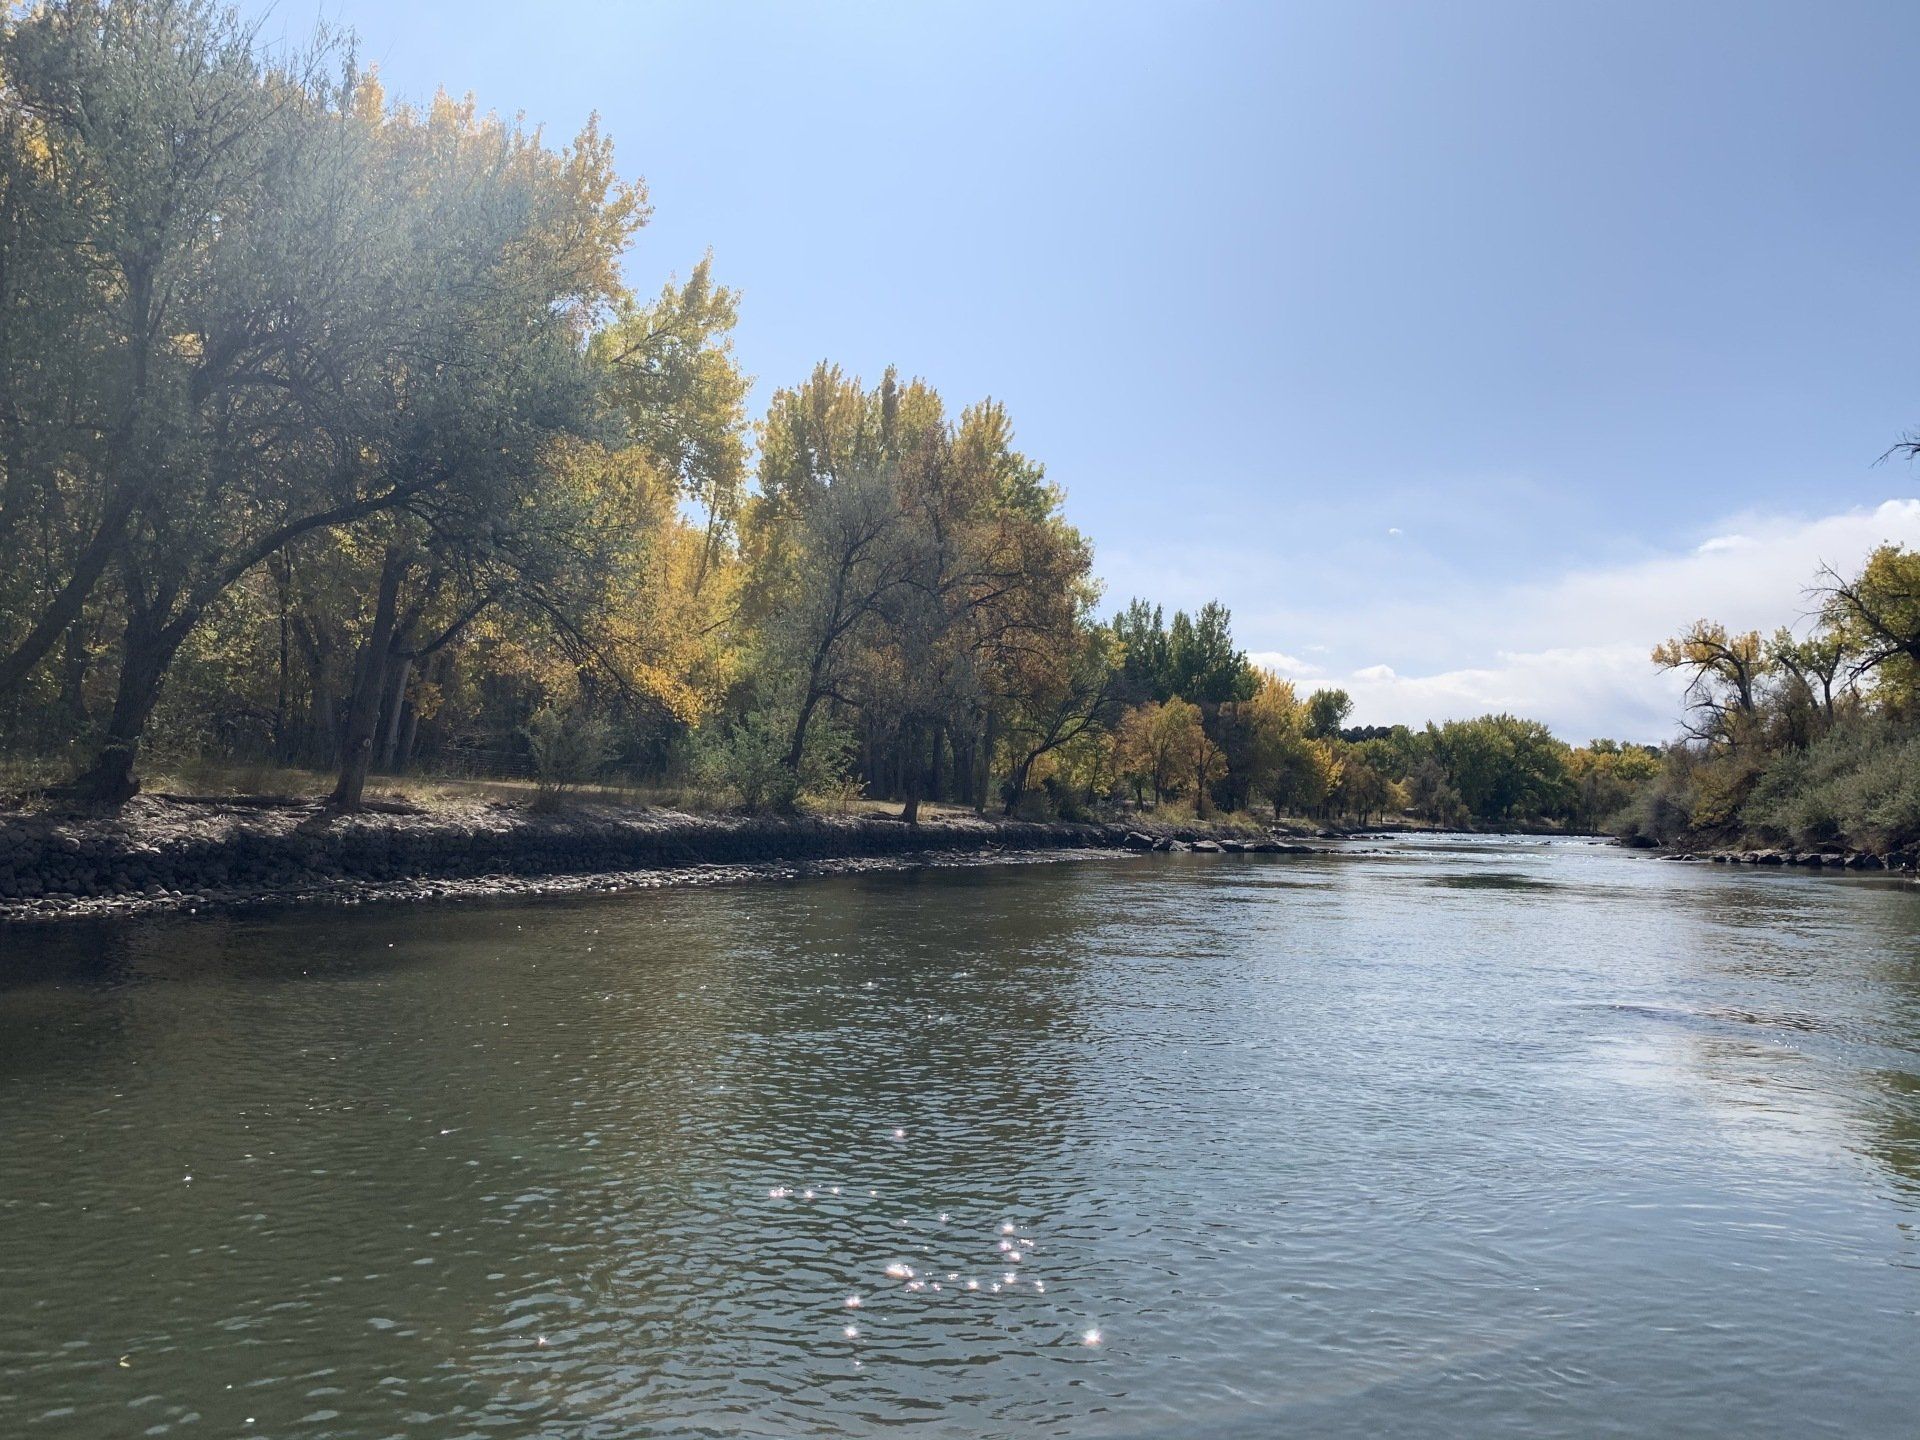
Getting Started with Gear Part 2

In the last post we talked about rods, reels, waders, boots . . . all the expensive stuff. Now we’re going to talk about some less expensive, but still equally necessary items.
Leaders
What is a leader? This is the (usually) clear line that attaches to the end of your (usually) welded loop at the end of your fly line. They come in different weights, lengths, and compositions. I’m going to keep this basic for now, but I do want to digress for a minute because it’ll make more sense when it comes to tippets. I’d really like for you to consider “tapering” your rig. To know what that means, you have to understand that fly line comes in different weights. Most trout and bass anglers are going to fish between 0x and 6x. Ox lines are “thicker” and have a stronger line strength than a 1x. A 1x is thicker/stronger than a 2x, etc. There are lines that are stronger than 0x and they usually start using normally pounds (break strength), that we’re used to.
When we discuss leaders, most leaders are “knotless” and “tapered” meaning that they are thicker where the welded fly line loop is in comparison to where you tie on your first fly or tippet ring. You can buy these in both monofilament and fluorocarbon. I’ll discuss the differences when we get to tippet, but to get started, just use mono. It’s cheaper and works great for a leader.
Let’ talk about tapering you rig. You’re going to want to buy a range of tippet spools. For Warm water species, you might want 0x-5x, and for trout, you’ll probably want 3x-6x. When we “taper” our rig for trout, as an example. The line might go in this order: 3x leader * Tippet ring * 12" 3x Fluorocarbon Tippet * First Fly * 12" 4x Tippet * Second Fly * 12" 5x Tippet * Third Fly. (Note, each state has it’s own regulation about how many flies you can fish on one rig).
The reason that we do this is because if we snag our third fly and have to break it off, we likely get to keep our first and second fly because the 5x tippet between the second and third flies has a lower break strength (breaks easier) than the 4x between the first and second flies. If we snag our second fly, we at least likely get to keep our first. This isn’t always true, but it works out most of the time.
So, as for leaders, if I’m fishing for bass or larger freshwater fish, I might fish a 1x or 2x leader. If I’m fishing trout on a 5wt rod, I start out with a 3x leader.
My favorite brand of leader is Rio Powerflex Trout monofilament leader. I try to buy them in 3 packs. Others are fine too. The Rio leaders just seem to be the most consistent and hold up the best. Plan on spending $12 for a pack of three. If you taper your rigs and use tippet rings, your leader can last several outings.
Tippet Rings (Surprise!)
Okay, I wasn’t planning on hitting this topic. I will, as with many other things, write another post about tippet rings in the future. First of all, if you don’t know what tippet rings are, you’re not alone. I walked into a local fly shop not too long ago and asked for some tippet rings. I received a blank stare in return. When the employee sheepishly said, “Uh, I don’t think we carry those,” I pointed to a small pack of Umpqua rings about three feet from his head. Much to my humor, he then said, “Oh you meant, TIPPET RINGS, yeah we have THOSE . . .” He clearly didn’t know what they were.
Regardless, many people in the fly fishing community think these are the best thing since graphite rods or sealed drags and they aren’t wrong. These are 2mm-3mm rings that you tie onto the end of your leader. Then you attach a length of tippet (usually 12 to 18 inches) onto the other side of the ring. Now, if you get broken off, snagged, or you simply change your first fly enough to eat away at that first section of tippet, you merely replace it instead of having to snip away at your leader thereby making the leader shorter. Another advantage to tippet rings is that you don’t have to connect your leader and tippet with a blood knot. Finally, I like to place my weight immediately up line from the tippet on the leader itself. This prevents the weight from sliding. So, it’s a win-win.
As for brands, I’d ONLY EVER go with Umpqua, Scientific Angler, or Rio at the publishing of this post. Umpqua’s are dark which is nice, but I like the use of the swivel for retention better on with Rio. Scientific Angler just started producing dark colored rings on a swivel and they look nice. I have a new pack sitting with my gear, but I haven't tried them yet.
For the love of the fish gods, do not use off brands, especially one labeled “Tenkara.” Most of the other brands, emphasis on the one brand, have sharp edges. You tie a knot, you hook a fish, the edges cut right through your line. No more fish. This happened to me on the water and I almost lost my mind until I looked at that “Tenkara” labeled brand up close and could see that these were like razors. It’s a pet peeve of mine when people produce or manufacture a product that they clearly haven’t used or tested. Like, not one person took those rings out the the water or, shoot, even tried to tie a line on in the shop? Really? Ridiculous. I digress.
The point is that tippet rings are a great way to go through less leaders and have your rigs last longer. About $10 get’s you a pack of them. If I only could buy one, I’d buy the Rio. The Umpqua retention device is maddening. Although the Scientific Angler rings look pretty nice. Quick tip, tie your line to the ring BEFORE you remove it from the swivel or holder. Finding a dropped 2mm ring anywhere, let alone on a river bank, is impossible.
Weight
At first blush, this may seem easy, and it is, kind of. The old pinch weights with the wings that you can get from Walmart will work okay. In my experience, they tend to snag more, but you can get them anywhere. The biggest thing is that you want a variety pack of some kind. Fly fishing rigs are more sensitive to weight than, say, a lake setup or ice fishing rig. My favorite is the Dinsmore Non Toxic 6-AA weights. They are lead free which is better for the fish, the water, and if you’re like me and sometimes put your weights in your mouth between taking them out of the dispenser and compressing them to your line, they’ll be safer for you too. I guess I can’t use lead as an excuse for my mental issues anymore . . .
You can pick these up for $18 or so and they will last you a really long time, especially if you reuse your weights. You’ll want to use your forceps to pry the weights apart. Also, remember, the non toxic weights are made of tin and therefore aren’t as heavy so you’ll need to go a bit heavier than your buddy who doesn’t care about a lead free environment; smug it up.
Indicators
You mean a bobber? No, an indicator. What’s the difference? One is more expensive and floats your rig. The other is less expensive and floats your rig. All kidding aside, there are actually some slight differences between an indicator and bobber when it comes to fly fishing. Lake or bait “bobbers” are generally much larger, brighter, and clip on with springs or hook retention devices. “Indicators” on the other hand come in a variety of colors including white and clear, are much smaller overall, and either wrap around your line or have a niftier adjustable retention. This isn’t to say that you couldn’t use a bobber as an indicator and vice versa, but I’d strongly suggest that you use one designed for fly fishing.
Indicators are generally made from plastic, yarn, wool, cork, or soft foam. The plastics are my favorite. I haven’t been able to get yarn or wool to float right yet for me although they are the most sensitive, meaning that you can more easily detect a strike or a change in the direction of your rig. A lot of anglers also swear by the yarn indicators. The foams are interesting, but they are stick on so they aren’t adjustable and leave crud on your line. So, I stick to the plastics and cork. Cork are great, but the rubber where you loop your line is hard to adjust. The two predominant plastic indicators are Thingamabobber and AirLock. The latter of are my favorite of the two because they use a tiny nut and rubber washer to lock it to your line. It’s ingenious and super easy to adjust. Thingamabobber is okay, but it kinks your line and isn’t as easy to adjust. It’s rumored that AirLock is coming out with a new model, so we’ll see what that’s like.
3/4 inch is probably the right size to start out for a new angler. They’re big enough to to see on the water, but no so big they drag your rig around too much. Go with whatever color you want, although you’ll find over time that the clear or white will fish the best. I personally fish with a 1/2 inch clear but it took me a long time to like it, get used to it, and be able to consistently find it on the water.
A pack of 3-4 indicators of any kind will set you back less than $10.
Floatant
I’m not going to spend much time here. This is simply a bottle of oil based goo that you apply to a dry fly to keep it floating. Call it what you want, but it just repels water. Dry Magic and Gink are the two biggest brands. Dry Magic is my favorite. Just put a little bit of this one your dry fly to help it stay afloat.
You’re looking at $10 or less for most floatants.
Nippers
They sure look an awful lot like nail clippers . . . That’s because that is what we used to use. You can use these to “nip” or cut your line when your pulling out tippet or need to cut a tag off a knot. Don’t spend much here to get started. The only “high end” nipper that I like is Abel and they’re right around $100. You can literally find steel nippers for $1. Buy several of them and just throw them away when they get dull. The other reason that you’ll want an actual nipper and not just nail clippers is that almost all nippers come with this tiny little needle looking thing attached to it. I didn’t know what the heck it was when I first started fly fishing, and I was too afraid (insert “proud”) to ask anyone what it was. Turns out, it’s for cleaning out the eye of a hook (sometimes there is leftover head cement) or helping you to undo a tiny knot you accidentally got in your line.
So, spend $5, buy five nippers, and you’ll be set for a while.
Forceps
Don’t you mean pliers? No, they’re forceps, it sounds fancier. Where’s the caviar? Anyway, you’ll want a mildly decent pair of these. Unlike the nippers, don’t get the cheapest you can find. I’m going to talk about how to keep them here in a minute, but you want to get a pair that will last you for a while. I personally like the Umpqua River Grips. They’re grippy and I get a flash of color so everyone can know that I spent extra money on name brand. Man, it’s late and I’m being a bit pithy right now. Please forgive me. These have locking teeth so you can crimp them down onto part of your pack. Forceps will also help you pull off your weights and you can even tie a really cool fisherman’s knot with them (another post for another day).
What to avoid? Really cheap and scissor forceps (they have both jaws and scissors in the jaws and you will unintentionally cut your line . . . in the middle of the river . . . with three flies attached . . . like me). I’m also not a huge fan of the forceps designed for mittens. They just feel weird in my hands. Cheap forceps feel, well, cheap. They have a tendency not to last very long, they rust, and the tolerance in the jaws is usually terrible and misaligned.
$13 will get you a set of the Straight Umpqua River Grip Forceps: https://www.umpqua.com/river-grip-clamp-5-straight/
Zingers! (BONUS!)
A funny or a “Yo mama” joke? Hardly. These are the little retractors that make all of us anglers sound like cats will bells on while we’re walking through the brush. It’s nice that we don’t startle people though . . . Or maybe they make us feel like we have the angling version of the Batman Utility Belt that our parents never bought us as kids. Either way, these nifty little contraptions not only look like we went off the deep end at the fly shop, they’re functional too!
In all seriousness, they help us not lose stuff in the 43 degree water of our favorite tail water and make it so that some necessary items are easily located. You can go nuts and put everything on a zinger; I’ll be snickering from the parking lot. But there are two things I really like to have on a zinger; my nippers and my forceps. The nippers are too small and you will lose them after you’ve already lost feeling in your hand because you had to revive a fish in the water for too long. Plus, it just makes nippers easy and fast to retrieve. Forceps fall in the water a lot. Just put them on a zinger and you’ll be glad you did.
Zingers can range from about $5 to $30. Just go with the cheapies for now. You’ll eventually want some Fishpond ones because they’re the best, but you don’t need to spend $30 until you’ve become a complete gear whore (yes that’s a real term in fly fishing because it’s a real thing). There’s also a “shop rat” meaning you hang out at a particular fly shop too much and yet you don’t work there. I’m both. Welcome to the club, friend.
Hat
Well duh, you need a hat. Here’s the deal, find a nice trucker hat that’s breathable and comfortable (I like the Flex Fit 110 hats) and just keep it as a dedicated fly fishing hat. You don’t need the ridiculous 3 foot wide had with straps to keep it to your head. If that’s you, you’re either 80 and you can wear whatever you want, or your new.
$15 can get you a good hat. $25 if you want a branded hat.
Polarized Sunglasses
I said this section was all cheap stuff, but this one isn’t so much. First of all, if you “Just have sunglasses,” that’s not good enough. I’m serious. Polarization is so important. Polarization works by cutting out the “glaring” horizontal light waves. This allows you to see better in all kinds of conditions but it really allows you to see better in the water. You’ll be able to see the bottom of the river including that big rock or log that would have sent you scrambling.
So, can I just grab that cheap pair of fishing glasses at Walmart? It says “Fishing Polarized” right on the box! Unfortunately, I wouldn’t. With polarization, you can get decent glasses for $25 to $50. If you want to start with the cheap Walmart pair it’s better than nothing. I’d at least look at Native or Sun Cloud. Both are pretty good. Although, I must admit, that my favorite polarized glasses are Costa Del Mar Glass Lens Sunglasses. They are incredible and make a night and day difference (pun intended). But those will set you back $100 from Sierra Trading Post (http://sierra.com) or even up to $250 from other retailers. You definitely don’t need these now, but just put it on your wish list with the Abel nippers, Scott Fly Rod, Ross Reel, and Fishpond Nomad Net. Sierra usually has some other good fishing glasses at great prices.
Flies
You need some. The end. However, let’s assume you don’t want to go invest in a Peak fly tying vice and start tying flies in your basement just yet. You also might not want to spend $3 per fly at Cabelas. A great way to fill up your box (Which by the way you should by the Cliff’s Day Tripper at some point, but the $2 plastic box will do for now) is to stop in each fly shop that is local to you, ask what’s fishing well and just buy 5-10 flies. Do this a few times and you’ll be set for a while.
If you’re going for trout, you’ll want some midges, emergers, attractor flies (stone flies or leaches), a few dries, and maybe a streamer or two. Don’t go nuts. Bass and other warm water fish will hit on many of these as well although you may want some poppers, wooly buggers, etc. This is why asking your fly shop is so great. They’ll steer you in the right direction, you’ll get some good advice, you’ll add to your box, all while supporting a local small business.
A lot of local fly shops also have “Fly Happy Hour” where flies are half off. Walmart oddly has a decent selection of flies although you won’t (usually) get any good suggestions from the sales clerk. Once you know what you like, you haven’t wanted to start tying yet, you’ll want to look on eBay or at local Fly Fishing expos. Beware, however, that not all flies are tied the same. Some off brand flies will fall apart on you after the first fish. This is another reason why I started tying my own.
Flies can get pretty spendy. Just remember, you don’t need a ton to get started. I spent my first day by myself with a plastic ramekin of just a few flies that a guy at a fly shop off the Taylor River picked out for me. It doesn’t take much.
*************************************
So that’s it! I hope you see that you don’t have to go nuts and buy every piece of gear under the sun. In fact, you can see that there are several pieces of gear that you can wait to purchase after you’ve had a few solo days on the water.
Most importantly, out of this post, I hope you see where you should spend your money. It’s too easy to walk into a shop and walk out with a second mortgage or having your credit card company call you thinking that your card was stolen because of the size of the purchase. Get started smart. Follow some, most, or all of the suggestions discussed here for a great beginning to your newest passion.

Waders? Yes. Boots? Yes. Rods and reels? Yes. Pack? Yes. Net? Oops, no, where’s my net? You systematically place all of your gear in your vehicle. You’ve done this dozens of times before. But something is different this morning. There’s a chill in the air that you didn’t recognize the day before. That shouldn’t be a problem, you tell yourself. Trout live in the water year-round. Afterall, they don’t really “leave,” right? Right?!? After running through your gear one more time, you begin to worry. It’s a Saturday, the river is probably going to be busy. But wait, it’s cooler, so that will surely stave off some of the fair-weather folk. Still, there’s something that feels off to you, you check your phone to see if the flows have maintained from a few weeks ago. Chagrin sets in. The flows have dropped and in a big way. You already had your day mapped out. You knew exactly where you were going, which flies you were going to fish, on which reeel and attached to which rod. You begin to wonder if your day is over. Your relaxation, reconnection, all gone. Or is it? We’ve all had those days. We get into a rhythm of fly fishing. We get to the point to where we almost know exactly what our day is going to be like and we aren’t even surprised to see the same fish twice over a few weeks. If you’ve paid much attention, however, you know that nature is anything but consistent. In a year with wildfires, draughts, hurricanes, heavy rains, blizzards, and much more, we shouldn’t expect Mother Nature to treat us the same every day. It’s for this reason that I’m a big fan of trying out new water and not getting too comfortable in one spot. I don’t know about you, but for me, fly fishing is a time for me to disconnect so I can reconnect when I get back to my home or office. It gives me perspective and time to think. Sure, I can get that by dredging my splitshot and size 18 emergers through the same trough 30’ off of the same path and in the same flows, but there is a little less magic in that. Part of what makes fly fishing great, is exploring. Finding new waters. New runs. New troughs. New riffles. This exploration allows for us to all get what we are seeking too. If you want to catch fish, sometimes you have to go where others don’t. If you want to focus on something other than work, there’s no better way than having to focus all your attention on something new. Is this post beginning to sound a bit like a different topic? Sure, but hear me out. So much of what makes the hobby or sport (yes, you can actually get exercise doing this) of fly fishing incredible, comes from the change. The change of our mental state. And, most certainly, the change of our physical environment. So, when mother nature changes and the snow flies or the people controlling the water several hundred miles away say the reservoirs are full enough, we can embrace that change. Will those days be harder than your previous and predictable outings? Absolutely. But that’s what also makes fly fishing a hobby or sport worth a life-long pursuit. If you fished the same 20’ wide pond for 40 years, you would probably not have grown one bit as an angler for 39 thos years and you’d get awfully bored to boot. As a side note, when I tell people that I’m an avid fly fisherman and pretend guide, I often get the response of, “Oh man, I hate fishing . . . sitting on the bank watching your pole and getting eaten by mosquitos. Not my thing man.” Is this me bashing the lake lovers? No . . . well, maybe a little. Ha ha. But it really illustrates what can make someone dislike fishing. Stagnation. Sitting and waiting. Immobility. Too much consistency. So, next time you get that unexpected cold snap, flow increase, flow decrease, heat wave, snow storm, or whatever, see it as an opportunity. It’s a time to explore. My brother, father-in-law, and I call them scouting or exploring days. We know we may not catch a ton of fish, or any fish for that matter, but we get the opportunity to grow as anglers. Sometimes, we try something new and don’t like it. I was at a spot recently due to flow changes that I thought would be great; not so much. But, one of my favorite fishing spots in all of Colorado came from the need to find something different and my father-in-law talking to a stranger at a gas station. Yup. So, I encourage you, embrace it. Embrace it when Mother Nature throws something at you. Put on an extra sweatshirt. Walk a little farther. Turn right instead of left. Throw a drift or two in a seam that shouldn’t hold fish. Talk to people. Most importantly, however, don’t let changes deprive you of whatever it is you get out of fly fishing. Embrace the changing waters.
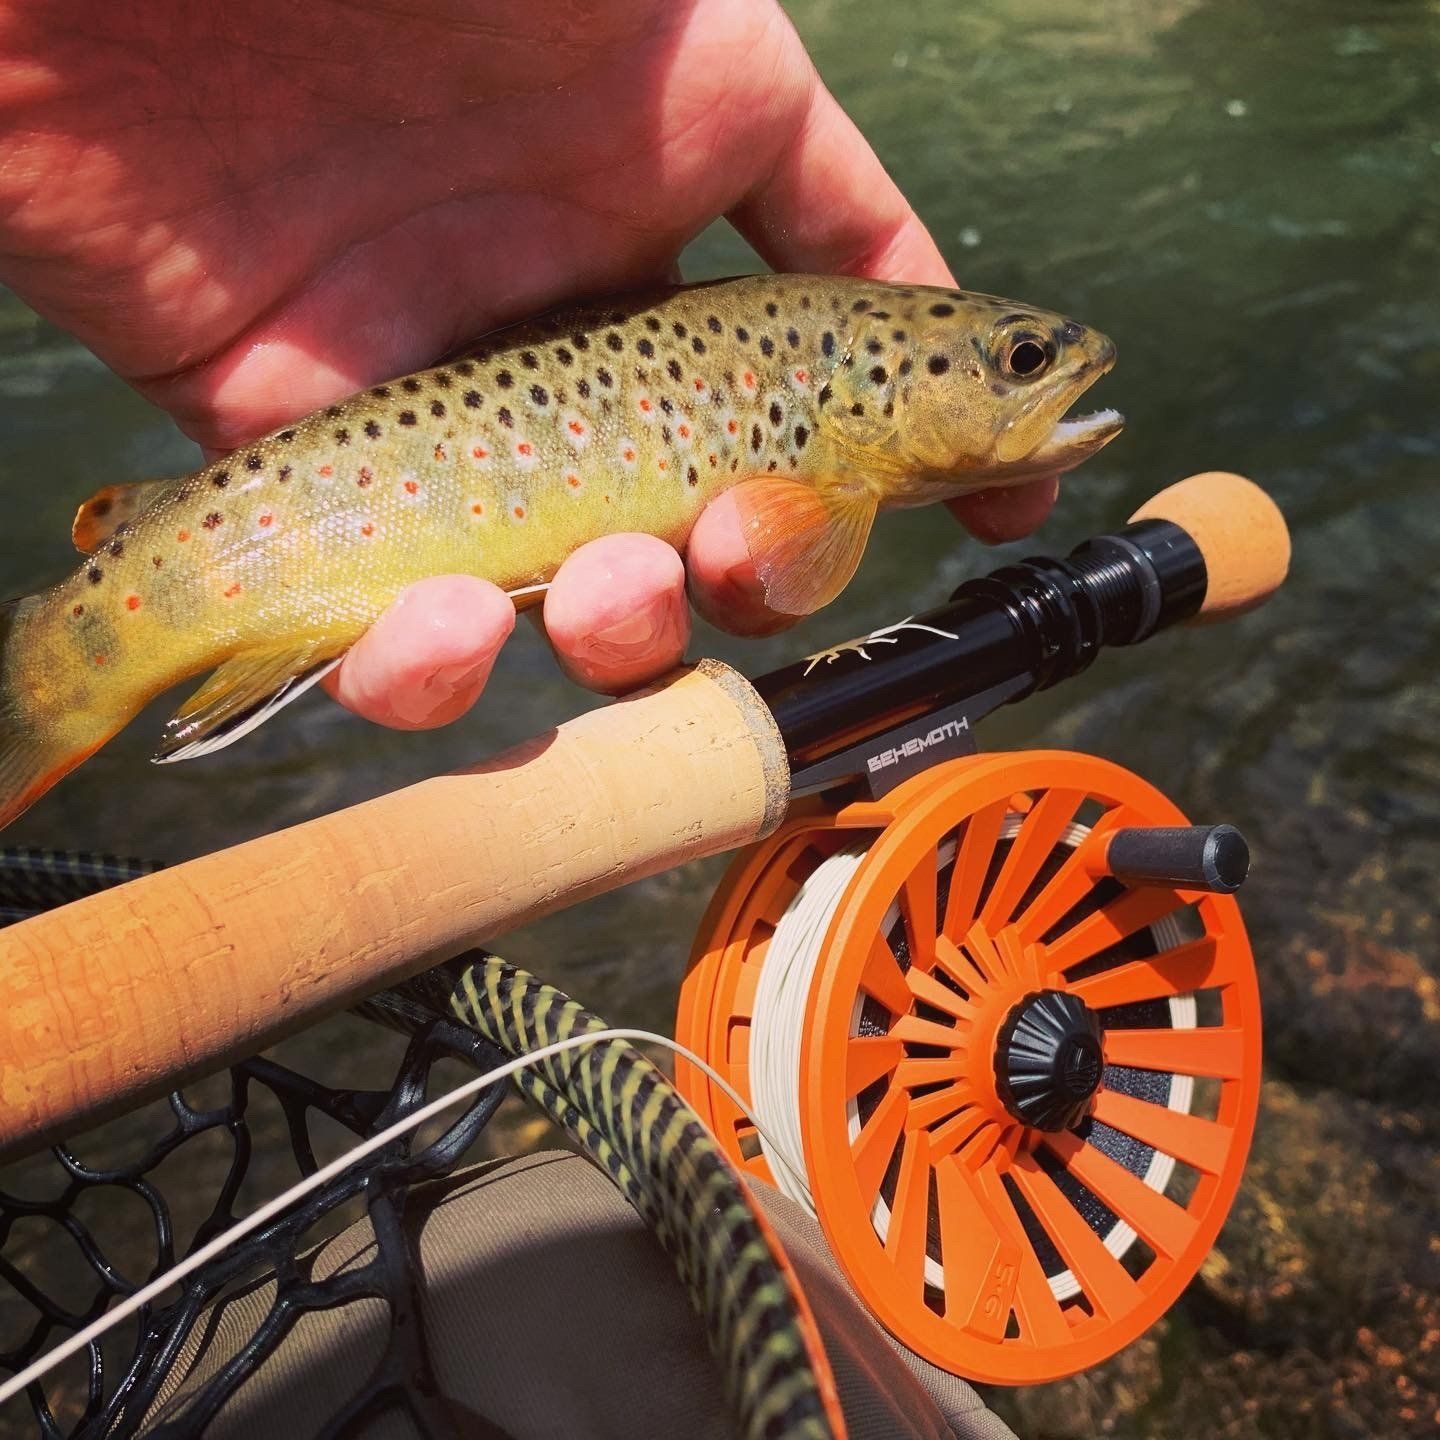
When I first picked up a fly rod all those years ago, I never could have imagined that there was more to it than plopping down an oversized dry fly waiting for a fish to feed opportunistically. Several years later, I was introduced to indicator nymphing. That changed the game completely for me. Knowing that trout, on average, consume 90% of their diet subsurface was huge. I went from prospecting for a fish or two to landing their food on their dinner plate. Indicator nymphing, although great and very productive, has some draw backs. The largest challenge I see is that, as a fly fisherperson, we are working with a rig that is constantly fighting itself. The indicator is being pulled by the current. Too large and we don’t see as many takes. Too small and it may not hold up your rig or pull your bugs downstream. Too much weight and you’ll snag every few feet. Too little and the indicator rips the bugs through the water telling those fish that there’s something wrong. Is your indicator in the same seam as your bugs? Did you mend? How much distance do you have between bugs? How much distance to your weight? How much distance from your indicator to your weight? It goes on and on. This isn’t to say that an indicator rig is bad. Quite to the contrary. It’s a great way to fish and is very productive. As a guide, this is how we start most people out. They can see a “bobber.” If it moves, set. Simple. Or so we hope. A solution to some of these problems came a few months ago. Gary, my father-in-law, told me that he was interested in learning to euro nymph. I had been curious off and on about it myself. I had heard countless stories from other guides and fishing buddies about how their friends who euro nymphed would come into a run after them and pick off several more fish. So, I took a leap. I purchased an Echo Shadow II in a 10’ 3wt. I mated it to a Redington Behemoth fly reel in hunter orange and spooled that with euro line from Scientific Angler. I watched a ton of YouTube videos and read countless other blogs. I was surprised at the lack of consistency for how each person fished a euro setup. Some ran sighter (alternating colors) leaders; some didn’t. Some ran tags; some didn’t. Some used long light rods; some didn’t. Some used weighed bugs specific to euro nymphing while focusing on the bead size; some didn’t. You get the point. I set out to find what worked for me in the waters I fished here in Colorado. I made all sorts of different leader setups with tags and no tags. Different kinds of flies. I tried various combinations. However, I, more or less, accidentally came up with a rig that worked out for me. The Echo rod and Redington reel setup worked amazingly well. The Echo was super sensitive without being a broom stick. I bought another one in a 4wt because I liked it so much. As for the leader, here is my current setup: 4’ of chartreuse Amnesia 20lb > 4’ of red Amnesia 20lb > 4’ of chartreuse Amnesia 15lb > 6-8’ of 12.5lb Seaguar fluorocarbon with figure 8 knots tied every six inches from the point. This allows me to tie in tags with a Davy or clinch knot just above the figure 8 in 4x or whatever I want. This then gives me a tag that I can adjust depending on the water depth and conditions. I have also chosen not to fish with weighted flies. Instead, I place split shot at the bottom of my rig (the point on the last figure 8) which effectively makes this an inline nymph rig. This setup gives me a ton of adjustment and I don’t have to tie and carry a whole separate set of flies. Now, I’m sure that one of your euro aficionados will tell me that there’s something wrong with this rig. However, that’s what I love about fly fishing and the subcategory of euro nymphing. It allows you to fish the way you want to and in a manner that’s best for you. So, am I officially a Euro Dork now? I think so. Over the last few months, I haven’t reached for a traditional nymph rig once. In fact, I’ve even stopped bringing other rods when I head out. Just this last weekend I was fishing the Arkansas with my brother. It was a slow day as the water was a bit on the warm side. I had the aforementioned euro setup and my brother was fishing a traditional nymph rig. Truth be told, I usually outfish him by a few fish (I fishe more than him so I get more practice), however I had landed 6 when he hadn’t caught any. That was unusual. I kept offering to switch him over to a euro rig. He kept declining. Just before we were getting ready to wrap up for the day, he let me change over his rig. The first two casts he caught two fish. Why, you ask? I don’t know for sure, but I actually have a suspicion that it had to do with the water temperature. Warm water isn’t good for trout and can make them lethargic. I noticed that the takes on my flies were VERY subtle. I then began to think that my brother probably wasn’t able to see the slight disruption in his indicator. I should mention that the rig was set up right. He had the same bugs I was using, and the weights were ticking off the bottom. A random pointer. Levi Lambert (a local expert guide) taught me that the difference between a bad day fishing and a good day fishing can be a split shot. This is so true. If anything, err on the side of going a bit heavier. Anyway, back to the Arkansas River and the lessons learned. I learned that on a day like that, being able to feel the fish eat your fly was the difference. I describe euro nymphing as a cross between streamer fishing (you usually feel the take) and traditional indicator nymphing. You are your own indicator and it’s pretty sweet. You can also pick your own seams and stay in there. You can control the speed at which your bugs float downstream or even where they float in the water column. I guess being a Euro Dork allows you to reach for full potential as a control freak. With that said, you’re not going to be casting much more than your rod length. So, will I ever indicator nymph again? Absolutely. This is just another facet of this awesome sport/hobby. It adds something. It’s another arrow in your quiver. I still have a lot to learn about euro nymphing, and fly fishing in general, but that’s what I love about fly fishing. This isn’t the sport that you walk in and master. Or, if you master part of it, there are still 1,000 other things to learn and master. It’s a lifetime sport. If you’re that fisherperson reading this who has stuck with one type of fly fishing, using the same bugs, going to the same spot on the same river, or pack the same sandwich with the same beer, expand your horizons a bit. Try something different. You, too, might just find that you’re a Euro Dork.
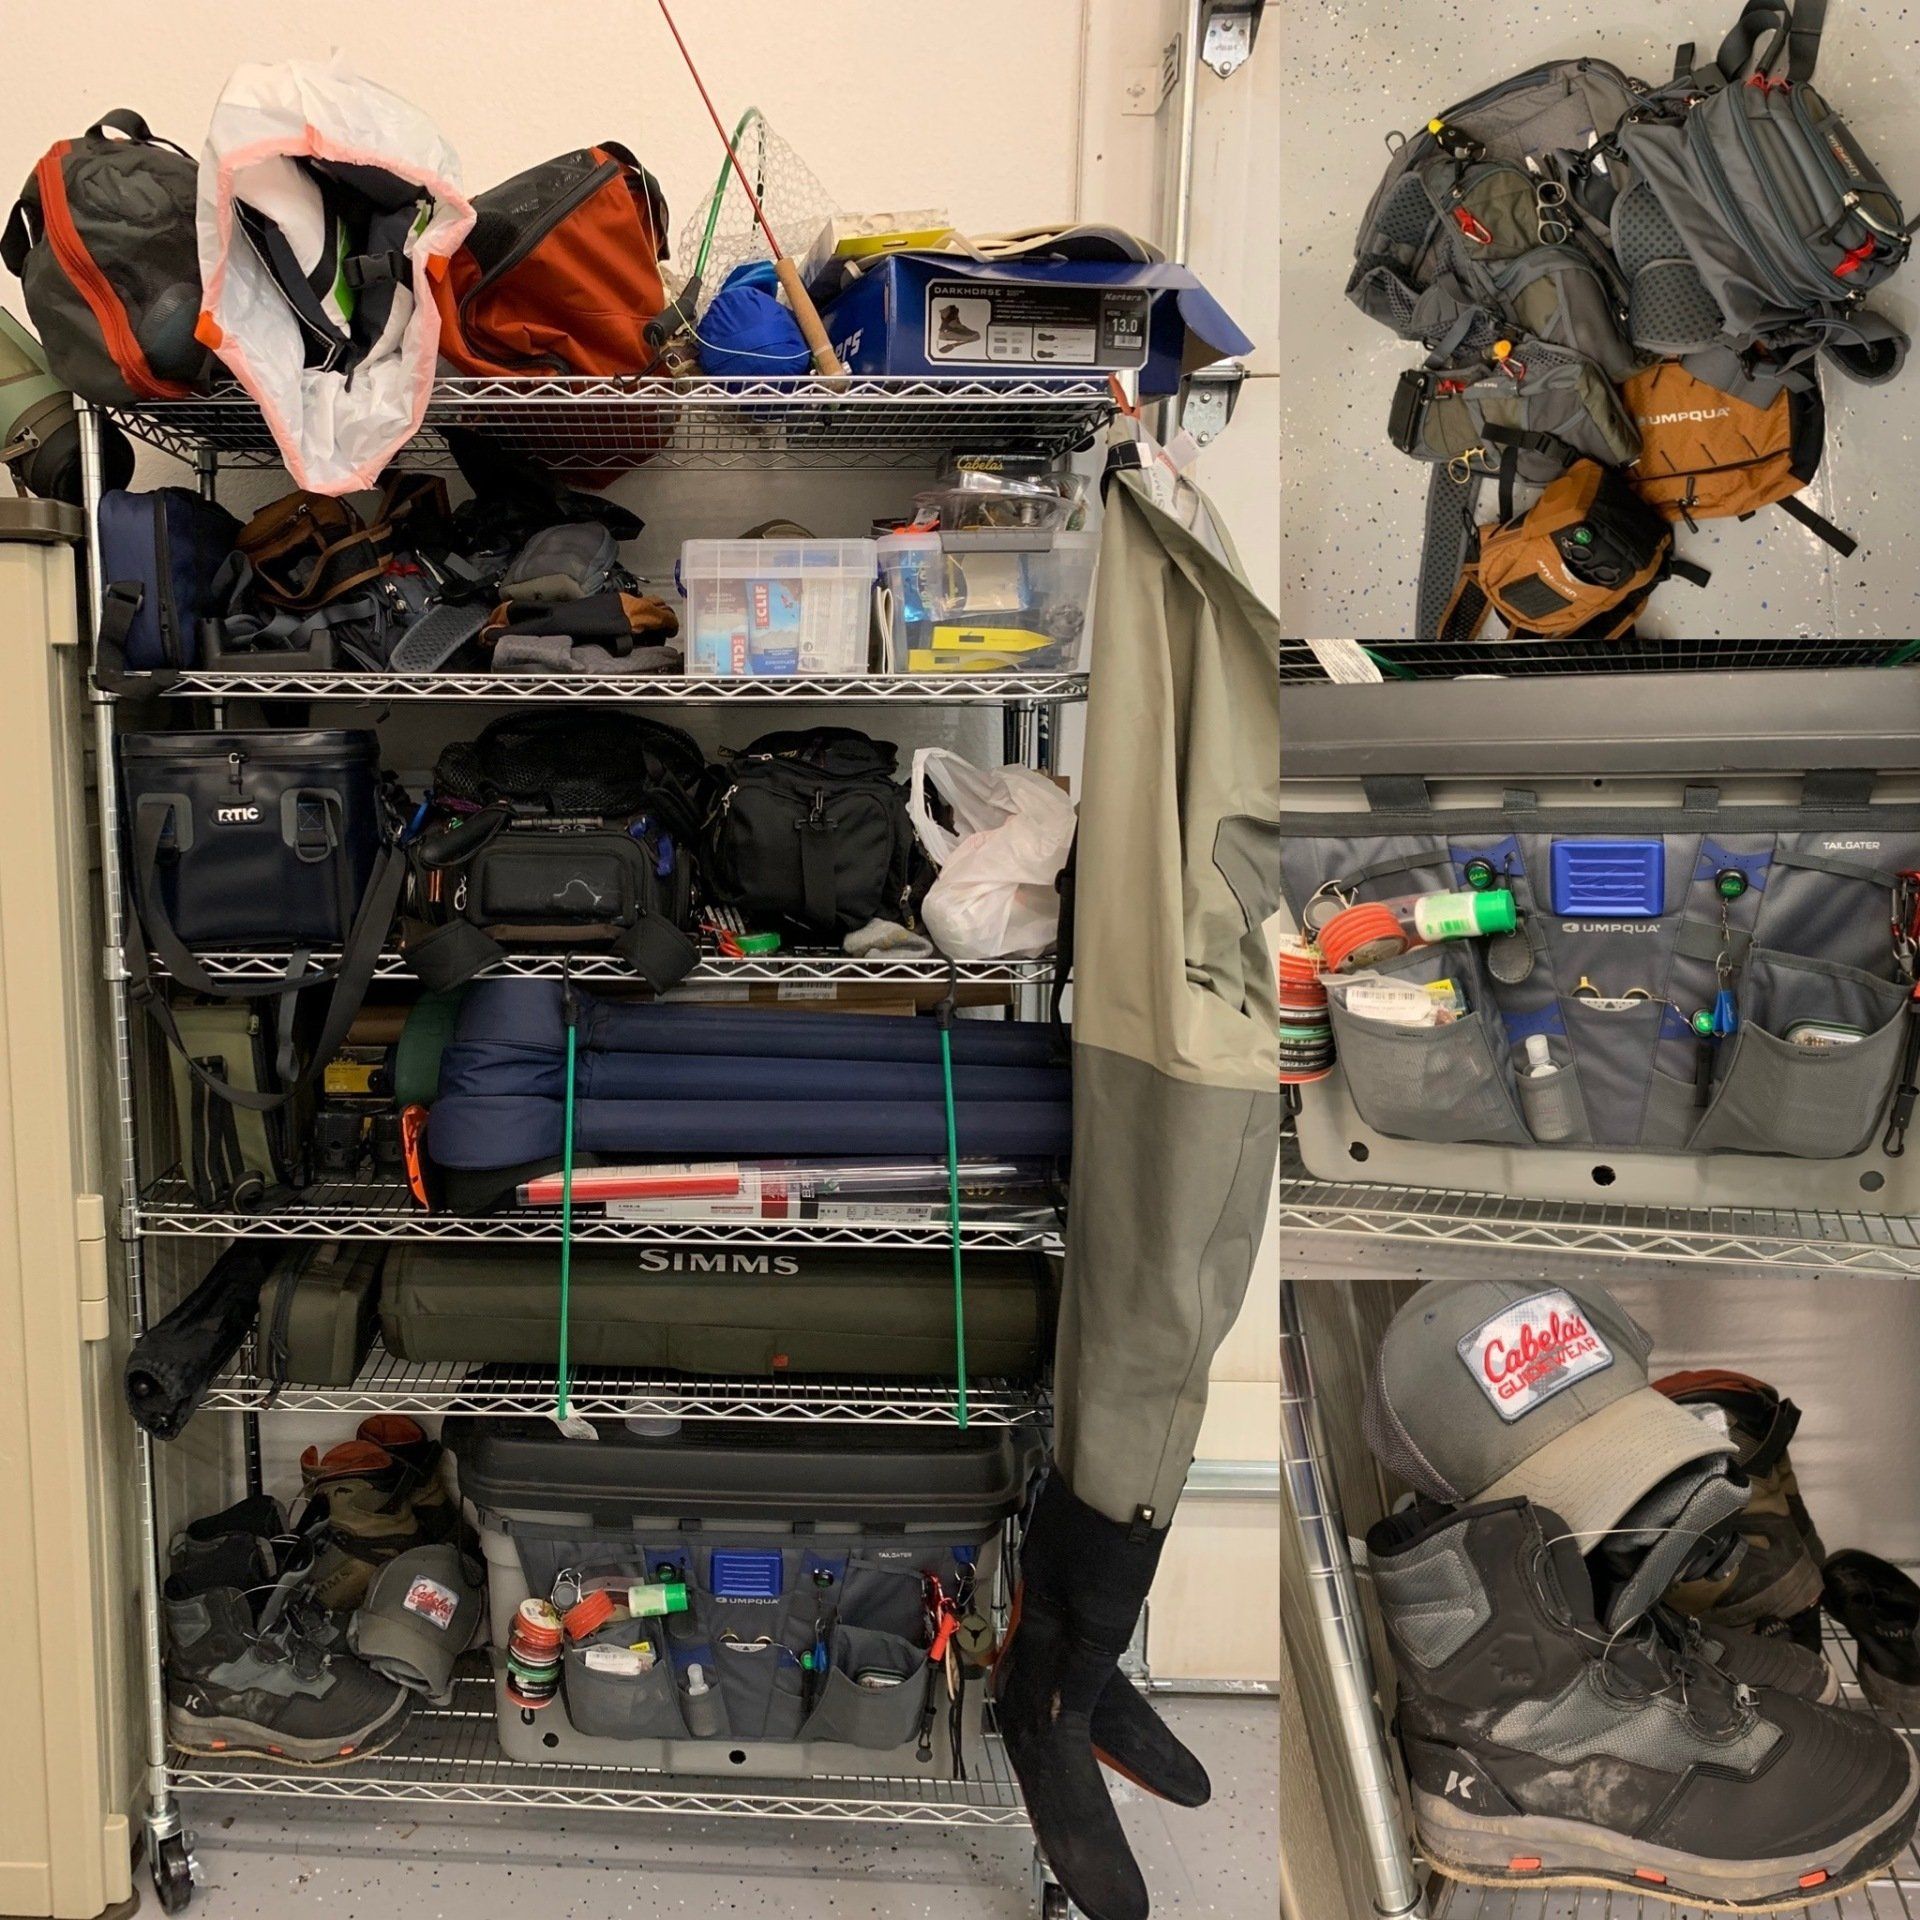
Indicators, packs, and waders, oh my! So you’re new to fly fishing and you want to get geared up correctly. Where do you start? How much do you spend? On what items do you want to spend the most and what can you skimp on until later? These, are great questions as are so many others. I want to start by saying that this blog and author are not affiliated with any fly shops or any retail anything. I just love fly fishing. That brings me to another point that might anger some. While there are many fly shops and retail stores that will tell you which gear is right for you even if they don’t sell it, to many retailers, the right gear is the gear they have on the shelves. This is true for big box stores and tiny shops. This isn’t a “bad thing,” after all, they exist as a business. I totally get it. I must admit that I’ve experienced this mentality a whole lot less at local fly shops. They’re more excited to get you going the right way even if it’s not from them because they’re smart enough to recognize that they are building a relationship with you that will hopefully last for quite some time. That’s the right move for them. With that out of the way, let’s assume that you have nothing. Maybe you were handed a gift certificate for a local big box store or fly shop. Maybe you want to get on the water with your buddies. Or maybe, the river is calling you and you don’t know why. Where do you start? After all, there are literally dozens of companies that make hundreds if not thousands of products ranging from really cheap (all implications of that word), to the most elite and expensive thing that you think the thread has to be spun with gold. At it basic form, to go fly fishing, you need the following (we’ll break down each one of these): --Fly Rod -Fly Reel -Fly Line -Waders -Wading Boots -Fishing Pack -Net -Leaders -Tippet -Weights -Indicators -Floatant -Nippers -Forceps -Hat -Polarized Sunglasses -Flies Don’t be intimidated. This list may seem pretty long, but lucky for you, many of these items can be had for a song and/or you won’t have to buy them again for quite some time. Some of the items on this list could also be considered “optional” but you’re REALLY going to want them, sooooooo . . . Alright, lets start breaking these apart: Fly Rod I’d say this this is your most important purchase, but I don’t think that’s true. I actually think that other items might be more important. When hunting for a fly rod, this is where I’ve seen the employees (again, mainly in the big box stores), push something because it’s what they have on the shelf or it’s what they fished with 30 years ago. A lot has changed. For most western, northwestern, and northeastern rivers, a medium to medium-fast 9’ 5 weight graphite/carbon rod is what you’re going to want. This rod is 9’ in length and the weight refers to the weight or heft of the line that the rod can throw. It’s also generally accepted in the fly fishing community that certain weight rods are better for certain types of fish. The weights range from 1 to 15. For trout, the most common are 4-6 weights and 6-8 for larger species or warm water fish like bass. You then get up into the double digits with salt water or Amazon-type fish. The length of the rod refers to your ability to get through brush, fish in tight areas, mend, nymph, and so much more. Longer rods have some better attributes while shorter rods have others. 9’ is kind of the sweet spot. I’ll discuss rod length more in depth in a future post. So, if you’re mainly going to be fishing for trout, go for a 9’ 5wt. If you’re going for bass or other warm water species (or just larger fish in general), go for an 9’ 8wt. Here is the thing about weight and length, EVERYONE and their grandma has a different opinion. Some guys swear buy 7wts for western trout rivers. I, respectfully, think they’re insane. Others will only fish a 3wt because they can really “feel the fish.” Again, insane. The point is that if you ask 10 different people, many will give you different opinion, but at least a plurality will give you the opinion I just did. As for “speed,” this is where you might start to glaze over when the salesman is talking to about weights, lengths, speeds, graphite vs. fiberglass, etc. Speed is interesting. There is how fast (or slow) the rod will react to being cast and then how fast (or slow) it will recover (come back to neutral). The other part of this is is how deep the rod flexes towards the handle. Here’s the biggest thing with this, as a beginner, you don’t want a “fast” rod. They’re great and can be extremely responsive and accurate. They problem is that fast rods leave very little room for error. I tried a few fast rods when I got started and couldn’t stand them; really I just sucked at casting and mending and the rod just made sure that I knew it. As for brands, see if you can find one that has a warranty and is from a reputable company. St. Croix is great for this as well as Three Forks Outfitters (TFO), Redington, and many others. You’ll want to go pick up these rods and shake them. So many people make fun of others when they do this saying, “What do they hope to learn by wiggling a rod in a store? Ha!” The thing they’re missing is that the person “wiggling” a rod in the store is deciding if this is a rod they want to pick up day after day. There really is something to this. Does the rod feel good in your hand? Does it feel alive? Or does it feel numb, heavy, or dead? When you go hunting for your starter rod, buy one that honestly feels good in your hand. You’ll know it when you pick it up. One could even say that the rod chooses you . . . Wands and Harry Potter anyone? Last point here. You don’t need to spend a ton of money on a beginning rod. Get one, as I mentioned above, from a reputable company that feels good in your hand. You’re going to end up buying several rods over your fly fishing career. I have a huge collection in my garage . . . I have a problem . . . at least I admit it. You can often find rod outfits that have a reel, line, and even a leader for a good price; often on sale. Speaking of on sale, I’m a big fan of Sierra Trading Post (Sierra.com). They sell name brand discontinued items at around 50% off. I’ve bought a lot of stuff from them and they’re great on returns too. Expect to spend $100 to $200 on a complete fly rod setup (combo) with a reel and line or maybe just the rod itself depending on what brand and quality you choose. Redington Crosswater Fly Rod and Reel Combo Orvis Encounter Fly Rod and Reel Combo Fly Reel Go cheap-ish. That’s all you need to know. Next! Okay, I’ll give you a little more. You don’t need to buy a $700 Abel reel. They’re amazing, but that’s WAY overkill to get started and you won’t appreciate the nuances of a milled U.S. made reel as you’re fumbling with your management loop while trying to reel in your first fish. I also wouldn’t go for an eBay special, either. You still want a decent drag and a reel that spins freely. I’m a fan of Cabela’s brand reels, some of the basic metal Redington’s, Waterworks Lamson Remix (Liquid), and many others. Personally, my favorite reels are Ross which are made here in Colorado, but they’re pretty expensive. Amazing, but expensive and not worth it to get started. Ross, if you’re listening, you need to bring back your entry level reels and rods for that matter . . . If you buy a reel by itself, not in a combo, expect to spend between $50 and $100 for a decent reel. A quick tip, when you’re picking on out, make sure the drag starts and stops extremely smoothly. This will protect tiny tippet and you won’t break off as many fish. Fly Line Okay, you can get lost in this one for days and no fly line company does a great job of really explaining what the differences are between their fly lines. As you’re getting started (Trout, Bass, whatever), just look for a line that has that specific description. If they have that specific description, they are true weighted lines (meaning that they aren’t heavier for use on faster rods), and that’s a good place to start. There are seemingly endless choices ranging from $25 to $130. Here’s my thought. Buy a decent line (mid priced) from a name brand (Scientific Angler, Rio, Airflo), and you’ll be happy. My favorite “beginner” line is Scientific Angler AirCel. It floats high on the water, isn’t super bright (I’m pretty sure bright colors scare the fish), and it’s only $25 to boot. Match your line to your rod; WF5W means that the line is Weight Forward for a 5 Weight. There’s usually an F or S following with stand for floating or sinking. You’ll want floating to start. Also, stay away from all the crazy tapers (the progression of the thickness of the line. i.e. where the bulk of the weight is located in the line), it’s just not worth it and you won’t feel the difference for a while. Or, your will, and you won’t like it. Reasonable price: $25 to $50 – don’t spend more than that to start . Scientific Angler AirCel Waders This is where you’re going to want to put a good chunk of your money. It may seem like something that you can skimp on, but you’ll immediately regret it. This is absolutely the case of “you get what you pay for.” Yes, they keep you dry, but you also want waders to be durable, repairable, washable, comfortable, breathable, and probably probably several other “ables” which I can’t think of in my coffee-less afternoon. Don’t buy neoprene waders or waders with boots attached. Seems like a good idea, but it’s a rookie mistake (I know . . . I made it . . . Twice . . . I’m a slow learner). Neoprene is hot and doesn’t breathe AT ALL! It’s also hard to move around in. Any wader with attached boots will rub your shins raw, you can’t change them out, and the worst part is that they are really loose fitting to that you can slide your foot it. You’d immediate regret your decision. So, for waders, you’re going to spend around $250 give or take. Find something with Gortex in it if you can and also with neoprene formed booties. Simms is the only U.S. made wader currently. Redington and Hodgman supposedly make some nice ones at an entry level. Also, go for the full chest wader (covering your chest) and not the pants. Check out the Simms Tributory and Freestone and http://www.simmsfishing.com You may also want to look at the Redington Escape waders at http://www.redington.com Wading Boots Really, we’re going to talk about shoes that are designed to get wet? Yup. Here’s the deal, there are a ton of companies; just find one that fits your foot. Wear your waders with thick socks when you try them on. Don’t trust the salesman to “Just go one size up” from your regular shoes. That’s B.S. and different from manufacturer to manufacturer. I hear that over and over again from fly fishing salesman and, although it’s a safe bet that they will fit, there is a good chance the boots will be too big and you’ll slide around which can be dangerous. You’ll want your boots, with waders and heavy socks, to fit snugly even at the toe. This way, when you wear thinner socks, you don’t end up with too much room. The bottoms line with boots is find something that fits both your feet and your budget. You’ll probably want a boot that either has cleats or the ability to add cleats. Cleats with felt is really the best, but felt is illegal in some states and you have to watch out for invasive water species like Zebra Muscles; just make sure your boots dry out completely before going to the next watershed. This is why I’m a big fan of Korkers. The boots cost the same, but you can switch out your soles as often as you want. Wading in river with slimy melon sized rocks like the Roaring Fork, use felt with studs. On a float trip in a dory boat, use the rubber soles. Going to hike a bit before you get to the water, wear the rubber with cleats or rubber and then switch them when you get to the water. Seriously check out Korkers; I made the switch (as did most of my family), and we all love our boots. Boots range between $70 and $700 (yeah, that’s nuts). For $100, give or take, you can find yourself a pair of Korkers which is the entry level for most other brands anyway . http://www.korkers.com Fishing Packs Ohhhhhhhh boy, this is a big one. There are SOOOOOO many different variations of packs that choosing one can drive you to drink. With that said, there are five basic packs; chest, vest, waste, sling, and backpack. Each one of these has there own advantages and disadvantages. I’m not going to go over each one of these in detail; I’ll save that for a future post. What I would say is this, choose a name brand (the attachments and thought put into the packs is just so much better). Think Fishpond, Umpqua, Simms, etc. You’ll want to make sure that whatever you buy has places for the following: nippers, net, forceps, fly boxes, water, snack, tippet, and anything else you’d like to take with you on the water. With that said, don’t go crazy and buy the biggest one you can find; you’ll fill each size no matter how big or small you buy and lugging around all that weight throughout the day sucks. Ask yourself, where do you want to carry your stuff. If you want your stuff readily accessible all the time and you don’t want to have to move packs around your body all day, a chest pack or vest will be the easiest. If you want to be able to put everything out of the way, a waste pack or a sling pack might be the best. Don’t want anything around your neck or chest, you’ll have to go with a waste pack. Currently, my favorite pack (I literally have all the different types mentioned above in my garage), is the Fishpond Switchback (https://fishpondusa.com/switchback-wading-belt-system.) It has a nice small pack that forces you to carry only the necessities, and it slides around on the outside of the belt which means your not moving your whole wading belt/pack around every time you need something. Your net stays in place at the small of your back. You can also attach all sorts of other things like other packs, water holders, staffs, etc. The shoulder strap also holds all kinds of little things like nippers and forceps. Plus, it’s only $100. I did purchase the San Juan pack to go opposite the pack already on the belt for me to carry my water, snack, and small camera. For packs, once you decide where you want to hold your gear (front, back, or waste), you’ll look at spending a minimum of $50 all the way up to several hundred dollars. I’d spend no more that $75 to $100 on a pack to get started. There’s a good chance you’re going to end up wanting something different every 3-6 months for a year or two until you start to hone in on what feels good to you. Net I’ve heard some guys say, “You don’t need a net. There are no fish in the river that big. Just beach ‘em.” This doesn’t make sense and it’s just not healthy for the fish. I’ll talk about healthy handling of a fish at a later date. Just please, don’t “beach” your fish. That’s where you drag your fish up onto the rocky shore instead of netting a fishing or getting it to the hand in the water. Yeah, it’s easier to take a photo, but it’s bad for the fish. I’m quickly derailing . . . Nets . . . Let’s talk nets. Find one that’s deep so the fish doesn’t flop out and, if you can, find one that is “fish safe” meaning that it’s rubber net instead of a fabric one. That’s all. The Fishpond nets are revered as the best, but, man, they’re insanely expensive. With that said, I have one, absolutely love it, and wouldn’t trade it for any other net on the market . . . unless it’s a new Fishpond net. You can find a rubber, fish-safe, net for $30 that’ll work okay for a while. Also, if you’re going to carry the net on your back, look for a magnetic net release with a leash; these are $12 on Amazon. ************************************************************************ Okay, I don’t want this to be too long. I’m going to pick up with leaders on the next post. Look for Part 2! With this info, I just want you to know that you don’t have to go crazy. The items we’ll talk about in Part 2, are quite a bit cheaper to get into your pack. You’ll be able to have a really nice setup without breaking the bank and/or having to re-shop for everything all over again after your first day on the water. For now, get yourself a decent setup, a rod that feels good in your hands, a quality set of waders, and get ready to get on the water.
If you want to live in a civilized society, people have to be civil to each other. “Thanks captain obvious,” you say. We all know this. Yet every day we see those drivers who cut others off in traffic, people who crowd you in line, owners who let their dogs run off leash (I’m sure I just upset some people here), and so much more. So, there’s how we wish people acted and how they act in reality. We aren’t always the best ourselves, either. Unfortunately, this is no different on the river or a lake for that matter. I’ve been fishing my entire life and it seems that without fail, every time I went out, there would be one person that wouldn’t act appropriately. Although, it’s almost worse on the river; more competitive perhaps? If you’re new to fly fishing, it’s my hope that this article can give you some guidance on proper stream etiquette. If you’re an experienced angler, maybe this will serve as a reminder, or at least something to validate you, the next time someone throws a cast right where your indicator just landed (happened to me last year). Plus, I’m a firm believer that if we ALL do our best to make fly fishing the best experience for everyone and not just ourselves, we ALL have a better time. So, here we go in no particular order: You’re In My Bubble This is an interesting one. Sometimes when we fish, we’re on a stretch of river by ourselves. After all, this is why we do it, right? Some tranquility? Some peace? No cell phone? Check out the Calm in the Current article. However, it’s tempting, when someone is in a run you know well, or at least a run you’d like to be in, to get up on them. This isn’t okay. Taking this into consideration, so many different parts of the river hold fish; I’m continually surprised. You’d don’t have to fish that particular run even though you netted a beautiful 22” butter belly brown from that particular section of water last fall. Move up or down to the next stretch. You can always come back and be the cleanup batter. More bragging rights that way. But what about combat fishing? This is where the particular stretch of water is so crowded because the trout are running or its just so popular that anglers are often considered “shoulder to shoulder.” You can see that this is one extreme to other mentioned above where there was no one. You have a few options here. Wait for a hole or a run to free up or simply space your self as far apart from as many anglers as possible. I was fishing a popular tail water a few years back. It was deserted in the morning but then filled up before lunch. I was fishing a pool at a small weir. It was so small that my rod covered almost half the distance of the pool itself; definitely not enough room for two anglers. I watched what was clearly a new fly fisherman eyeing the various spots, or lack thereof, from the bank. He fixed his eyes on me and walked straight across the river to me. He stood opposite the pool and started casting directly at me. Given that he was clearly new, every bit of his setup was still shiny, I took this opportunity to explain that fishing like this wasn’t the best. He smiled, apologized, and went on his way. Nice dude, he just didn’t know. Compare this to another angler that I had the “joy” of meeting at a much smaller and less populated river here in Colorado. This freestone river was only about 30 feet across in most places so you may have a run or two and then have to walk for a bit before you find your next one. I was in the only real run for a 50 yard section. I noticed that an angler came up behind me. He watched as I pulled two nice size (for the river) rainbows out of the run. He then proceeded to scramble down the bank less than 20’ ahead of me and started fishing. He was even so gutsy as to cast right where my indicator had been just a second or two before. I asked him sternly what he was doing. He just stared at me. I told him that he needed to be a more courteous fly fisherman and go find another run. He paused. I said I was serious. This wasn’t a threat or anything like that, although I’ve heard stories. It was just clear to me that this guy, who was experienced enough to land his rig essentially on top of mine, just hadn’t been educated or maybe he knew it was poor behavior but no one had ever said anything before, so . . . This was a long one, but the point is here, you wouldn’t want someone to crowd you so don’t do it to someone else. You’ll have more fun and they will too. Yes, I recognize that certain tail waters may not permit a ton of space, but give what you can. A great rule of thumb here, is if you’re wondering whether you’re too close, you probably are, and move along. Oh, and unless the river is huge, don’t ever fish directly across from someone unless you know them. It’s weird. Say Hello and Be Courteous It baffles me how there are two extremes of fly fisherman. Those who glare at you and those who are super nice. Which one do you want to be? I’d strongly encourage you to be the latter. Even if you don’t say, “Hi,” just wave as you’re walking by. Another great tip that I got from a class I took early on, is to ask an angler which way they’re going. Meaning, if you pull up into a parking spot with another angler and they’re almost ready. When you hop out, say “Hi,” and then ask, “Were you planning on going upstream or downstream? I’ll go whichever direction you don’t since you were here first.” You’ll surprise the heck out of that angler and you just made a friend for the day. I’ve done this several times with great results. The last part of this is to respect why anglers are there in the first place. For everyone, it will be different. I say this because I’ve said “Hello” to some anglers while asking how they did to just get a short, “Hi and fine.” Others, I get a complete recounting of the day. I’ve even swapped flied with other tyers and shared pointers. If someone wants to chat, great. If they don’t, great. If you do or don’t, great. We’re all there for our own reasons, but we can still be courteous. Popping out of Bushes and “Playing Through” If this hasn’t happened to you yet, it will. You’re walking through some heavy brush to to to a run and you pop out of the bushes only to find that you’re about 10’ from another angler. What do you do? Just apologize, and go back the way you came. Don’t try to awkwardly shuffle behind them or walk through their run. There are going to be some times when you want to leap frog another angler as you both are working your way upstream (or down); you’re going to want to play through. I’ve seen too many anglers, including having this happen to me several times, just walk through the run to get to another spot. There’s no need for this. Just get out of the water and walk the extra 20 yards to avoid this all together. A few weeks ago I was fishing the Arkansas. I wanted to go around two anglers who were fishing under a bridge. I wanted to fish the opposite bank and farther upstream than they were. So, I simply crossed way down from them in some super shallow riffles as to not disturb anyone or any fish. They clearly appreciated it, as they told me about another hole they found as I walked past them on the opposite bank. This leads me to another quick point, don’t ever stop and stare at another angler while you’re clearly looking for a spot to fish. It makes them think that you’re going to drop in on them. A Guide to Guides Fishing with guides will probably be a future post, but guides are definitely worth mentioning here. If you see someone who looks like a guide, meaning that they have a big net and are clearly trying to put someone on some fish, don't crowd them and make sure you give them plenty of space. Remember, this is our hobby, but it's their living. This doesn't mean you have to give up a run because a guide is eyeing you after they popped out of the bushes on you (yeah, that happened to me once). It just means that we want to make sure we don't do anything that would impact the client's ability to have a good time on the water. But what if it's just a friend teaching another friend? Well, don't we want more people to enjoy this wonderful activity? Give them some space too. Garbage Man, this is a big one, but most fly fisherman are pretty good about it. Just don’t leave garbage behind; that includes fluorocarbon, leaders, or anything else. We go to these places to enjoy the serenity. Let’s keep it clean. Or, do one better, and pick up some trash each time you’re out. I promise you’ll feel better about yourself and the Fly Fishing Gods will bless you! Don’t Be a Lake Creeper Growing up, when my father or I hooked a fish and noticed that some of the other fisherman along the bank of the lake started inching towards us, my father would call them Lake Creepers. When we were on the river and this happened, he’d just simply call them lake fisherman. If you’re not catching anything but the angler downstream from you is slamming those bows, don’t give into the temptation of working your way towards them. First of all, they see you no matter how nonchalant you’re being. Second, you’re quite likely going to invade their space. Third, there is likely fish where you are too, you just probably have a different rig, flies, weight, setup . . . Something. Figure it out instead of being a creeper. Lost Territory First of all, you don’t own the river (unless you actually do, then you’re fishing your private land and please call me because I want to be your friend!). We need to understand that. This doesn’t mean that you shouldn’t be allowed to fish a run undisturbed, but it means that we have to share. I tell my 3 and 5 year olds this all the time. With that said, what happens if someone gets pulled away from a run they’re working? Maybe they hooked a large fish that took them downstream a bit. Maybe they had to step out of the water because they were cold or needed to tie on a new rig. Maybe they snagged the bank. Maybe they had to take a VERY important phone call; otherwise they shouldn’t be answering the phone since they’re fly fishing and that’s like taking a call in church. Whatever the reason is, don’t just go rushing into that run. If it’s clear that they aren’t leaving, let the run be and allow them to go back into it. If it looks like they might be leaving and you’d like to see if you can pull a few more fish out of there, just ask. This goes back to being courteous. Even if the angler is leaving, they’ll appreciate that you asked and often share some advice with you. A run, is a run, is a run This references some of the other spacial rules, but it’s really important to know where an angler is going. Meaning, let’s say you’re on a large tail water somewhere (by western state fishing standards). Say the Blue River in Silverthorne or the Arkansas below the Pueblo dam. The runs can be huge in these areas. Look at what an angler is doing before you slide down the bank into the river. Are they working up or down. If they’re fishing streamers, they are likely working down and if they are fishing dries or a nymph rig they are likely working their way upstream. Is where you want to go part of where they want to go or will be in a very short time? As an example of this, a few years ago, I was fishing the aforementioned Blue River in Silverthorne just below the dam. For those of you who have no idea what I’m talking about, this is a Gold Metal stretch of water that is bordered by an outlet mall. It’s super weird, but great fishing. I was fishing a relatively short run. Maybe 50’ or so. Two anglers walked up the bank along side me. Didn’t say hello although they looked at me (I’d almost put them in the glaring angler category), they passed a small bush, and dropped right in at the top of this run. The river was wide open otherwise. They weren’t so close that I was going to hit them with my indicator (although I’m sure I could have if I wanted to . . . I have a tendency to fish with too much line out), but they basically ended my time in that run. I could only fish another 10’ or so farther upstream and then I was getting into their swing. Sure, they were close, but I think it was more so that they just didn’t think about where I was going or that it was all one run. A quick note here is that I don’t think that we as anglers get to say that everything we see is all one run. It’s like the line from Jack Black in Saving Silverman when he picks a nacho off a plate and the rest of the nachos are stuck to the first chip. Black says, “If they’re stuck together, it counts as one nacho.” Although we’d always like that to be true, again, we don’t own the river by calling it a single run. Unless, of course, as I mentioned before, that you do own the river in which case please contact me through this blog; I’ll help you keep your fly box full. Just to make this rule a bit longer, I was on the Arkansas last year below the dam in Pueblo. If you’ve ever fished this water, you know that the river is basically divided into sections after the stream restoration several years ago. There is a weir, followed by several rock structures, followed by a tail out, followed buy another weir. There’s one stretch of this river that has at least 6 or 7 sections just like that, one after the other. On this day, I was in one of these sections and all but one of the others were empty. Another angler, who seemingly appeared out of nowhere as all I heard was the splash of his boots entering the water right behind me, walked in the water along the bank to fish the weir. I was fishing the middle rock section. Again, were he to have watched me for even a minute, he would have noticed that I was fishing upstream, with an indicator nymph setup and taking a step every 5-10 casts (keeps me moving with different drifts). Just like the other guys, I probably could have hit him with my rig if I really tried. I thought about it. Instead I just got out and walked up to the next section because it was completely empty. Anglers that cut your run short almost make you feel like you only got to eat half the steak or something. It’s an unpleasant feeling; like you left something unfinished. Don’t take away someone’s steak. So, this was a long article and I’m sorry (not sorry). If everyone were to follow some simple rules, all of us anglers would have a better experience. Sure, we might not get to fish the run we wanted to right then, but, at least for me, this has pushed me to explore different areas. Really, this is just the golden rule, right? Do unto others, as you would have them do unto you. Would you want someone jumping in that close? Would you want someone crossing through your run? Would you want someone to glare at you as they walked buy? Would you want someone to jump into the run you were working just because when that hook popped lose from a decent trout, you got a snarl, and have to cut apart your rig? The answers to all of these questions is clearly “no.” So, not only do we have the opportunity not to offend or upset another angler, we actually have the ability, collectively, to make this a more enjoyable activity. In the words of Smokey the Bear, “Only you can prevent foolish fly fishers” . . . Or something like that . . .
My dad came into my room at about 4:00 a.m. and told me it was time to go. I was 12 and my youth wanted me to stay in bed, but my future was calling. My dad and my uncle had rented a car to make the 4+ hour drive from our home in Arvada, Colorado to the Cabela’s flagship store in Sydney, Nebraska. Although his 1967 Volkswagen beetle would make it, it would take a while and there wasn’t a ton of trunk space. A few hours must have passed as woke again to the sun shining through the rental’s window. We were on our way. That day was filled with a lot of surprises. Just seeing the mammoth store for the first time was incredible. More surprising, though, was what my dad purchased for me while we were there. You see, my dad was a very frugal man. My mother (they are now divorced) would often quip that my dad would die of starvation with $1,000,000 under his mattress. That was most of my life with him, but that day at Cabela’s was different. My dad purchased me a complete fly fishing setup! Sure, it was inexpensive, but it was all of it. The vest, waders (neoprene), boots, rod, reel, line . . . the whole shebang! I wore the waders around the house for several days before I took them to the lake by our house. I remember the first moment that I ever stepped foot into water with waders. I can still feel it in the soles of my feet. My fishing life would be forever changed. “Wait, I’m in the water and I’m not wet! WHAT? I’m part of the water now!” Yeah, that sounds a little “hippyish,” but was just as true then as it is now. I spent hours teaching myself to cast, although I did it alone and I wasn’t a great teacher. In fact, my father and I were both poor teachers of fly fishing at the time. He didn’t teach me much about the art of fly fishing. Rather, he bought me all the gear, handed me some old dry flies out of his box, and sent me on my way. Needless to say, I wasn’t “hooked.” Sorry, couldn’t help myself with the pun. Although I had fished my entire life, I had no love for fly fishing. Literally, my earliest memory is holding a rod along a river bank. We were salmon snagging if I’m not mistaken. I have a memory of falling down the stairs at a young age too, but I don’t know which happened first. The point is, I was raised on fishing, yet despite the shiny new gear, I lost interest faster than my waders dried out. Why? Because, unlike a lot of other fishing, think red/white bobber and a worm, there’s so much more to fly fishing. Dry or nymph? Streamer? Swing? River? Lake? Warm water or cold water? Water temperature? Hatch? Weather? It goes on and on. This is why they call it an art. You don’t ever master it to the point of moving on to some other type of fishing. You just get better and better the more time you commit. It’s truly a hobby for a lifetime, but I just didn’t think it was for my lifetime. Fast forward. My mom ran over my fly rod when I was in my late teens. That gave me a good excuse not to pick it up again. I went to college, got a job, got married, and had two kids. I kept fishing over those years. Spin fishing. Lake fishing. River fishing. Bait. Lures. Whatever. Just not fly fishing. My wife who knows me better than I know myself surprised me one day. On Groupon, there was a coupon for a beginner fly fishing class from Minturn Anglers which used to be located in Parker, CO. She purchased it. My mother, a few months earlier had purchased me another basic Cabela’s setup; waders and all. She insisted it was because she knew how much I loved fishing and wanted to give me another outlet. I teased that it was because she crushed my dreams like she crushed the wrapped graphite with her car. Six one, half dozen. Before I had a chance to go to the beginner fishing class, I went on a guys trip with some friends and I threw my fly fishing gear in the bed of my truck along with my spin gear. We camped along the Taylor River 35 minutes outside of Gunnison, Colorado. There were a number of issues with that trip. Weather was a big one and the other one was that I was the only one of the four of use who didn’t mountain bike at the time (I took that up later). I had my untouched fly fishing gear in the back of my truck where I thought it would remain. In fact, I had just been throwing a panther Martin from my Eagle Claw glass spinning rod for the first part of the trip. Tired of sitting at the campsite by myself, I called my wife and asked her if I could spend some money. She’s never said no that question and, yes, I’m well aware of how lucky that makes me. I booked a half day guided trip from Three Rivers Resort in Almont. I met Jake Alpert, my guide for the morning, just as the sun was peaking over the mountain tops. I insisted on wearing my cheap Cabela’s neoprene waders with attached boots. Jake repeatedly asked me if I wanted to switch into a nice, almost new, set of Orvis waders with separate boots. “What a sucker,” I thought, “mine are all one piece, these will be way easier.” I chuckle now as I write this because we don’t know what we don’t know, but man, I didn’t know much! I insisted upon using my unused 6wt Cabela’s setup too. Jake asked me if I wanted an Orvis 5wt. I wondered why this guide was trying to give me a lighter rod. I wanted a heavier rod. After all, that meant fly fishing was easier or something, right? Bigger fish? Greater distance? Again, the ignorance. He tied on a rig. “Three flies! What? That’s ridiculous! Three! Ha!” I remarked to myself. “I’m not that desperate! Wait, and a tiny little bobber (indicator) and weight between the bobber and flies?!?! This guy is nuts!” Yup, I had a long way to go. You’re probably a bit concerned, yourself, that you’re reading a fly fishing article written by a guy that was this . . . uneducated, we’ll say. But, you made it this far, so keep reading. I spent the next four hours slipping over rocks in my rubber booted waders, using a fly rod that was too heavy for the stream, missing strike after strike because the “bobber” wasn’t red and white, tangling my three flies, snagging, hooking myself, hooking the bank, hooking trees, and, oh yeah, catching one 6 inch trout. It was glorious. I was in. This was to be one of my new hobbies and passions. Wait, how did I arrive at that conclusion? Why did I fall so madly in love? It’s because, like Socrates at his trial before he was executed for corrupting the youth, I recognized that I knew nothing. I’d been fishing my entire life and yet I knew almost nothing about fly fishing. I stand by the fact that I could (and still can) read a river pretty well, but otherwise, I knew nothing about fly fishing itself. My dad had only briefly taught me about dry flies. That’s it. Put a worm on a hook under a bobber and we can often do fairly well (no knock on lake fisherman). Fly fishing was, and still is, different. No matter how much you know, you can always know more. Your cast can always be better. The river is always changing. You can tie your own flies. Change up your 9’ 5wt for a 10’ 4wt or a two-handed switch rod. You can throw streamers, softly land dries, or drown a nymph rig. This isn’t meant to be elitest. Quite the opposite. Anyone who claims to be a “master fly fisher” either hasn’t exposed themselves to enough or they’re just lying to themselves. Every guide I talk to, when I mention how much they know, they always say, “Yeah, but I have so much more to learn. I learn every day.” So, what’s my point here? If you are brand new to this sport, embrace the journey. Regardless of how much you know about fishing already, there is still so much more to discover and it’s wonderful. Do yourself a favor, though. Either take a fly fishing class or save up and split a day with a guide between you and your buddy. You’ll learn so much and you’ll get started the right way. Another tip for those of you who tend towards frustration . . . let it go when you’re on the water. There’s a lot to learn with fly fishing and you’re not going to master it in a day, a week, or a year. Force yourself to enjoy the process. If you’ve been in this sport for a while, continue to push yourself to learn more. Try, as Duane Redford (Author and Guide) encourages, to master a stretch of river. Maybe try tying your own flies; there’s very little more gratifying in fly fishing then coming up with a new pattern or landing a fish on a bug you tied in your basement. Not to mention, it’s a HUGE cost savings too and, as my father-in-law says, a great way to “get on the water without leaving your house.” Make an effort to learn from others. After all, someone always knows something you don’t. I think we as humans often crave adventure. Even if that adventure is getting up at 4:00 a.m. and traveling to a different state. Adventure can be hard to find in this day and age. But so many of us find in it fly fishing. It’s because each fly we tie is different. The flows can change a run we’ve fished 100 times. You’ll learn things you never knew as you start out. There is always something just around the bend . . . Give it a try or try something more . . . even if you think you can fish.
A flash of light catches your eye; the first glimpse of water you can see from your vehicle’s window. A riffle? A run? Should I stop? Yes. You find a place to park your vehicle out of the way, still eyeing the river through the brush along the bank. You open your door and the cool morning air floods your vehicle; it’s refreshing and exhilarating. You take a deep breath; the first you’ve had since you can remember, and it feels good. You assemble your rod ensuring that the guides are aligned – your reel aligned as well. You begin running through the standard questions, “What will the fish want this morning? What did they say at the fly shop? What’s hatching? What rig should I run? Dry? Dry dropper? Soft hackles? Skinny? Nymph? Streamer? How much weight? What color flies? What size?” You throw on your safety rig. You know, the rig you start with on almost every water because it’s served you so well in the past? After all, we’re creatures of habit. One foot, then the other into your waders. Boots laced. Sunglasses on. Fly pack. Net. Done. You lock your vehicle and a sudden silence falls over you. The audible babbling of the river can be heard through the brush. You listen as though it’s going to tell you where to go. As though it’s an old friend calling you. One who knows your life’s struggles, frustrations, sadness, successes, and stresses. You push your way through the brush paying no mind to the scraping branches for there’s something waiting on the other side. There you are at the bank. The first step into this running water is almost magical each and every time. The crunch of the gravel under your feet is something that every fly fisher can feel even when they’re not on the river. With that single step, you’ve moved to a different world. A world of calm and tranquility. As the current rushes by your waders, it almost seems to take your worries and stresses with it. Almost like it knows what you need. As a fly fisher, you will spend the next several hours thinking like a fish. Focusing on an indicator or a dry fly riding high on the water’s film. Your attention shifts. No longer are you directly focusing on your family member who has fallen ill, the big project due next month, or the bills that you have to pay. The focus is immediately present, or in the “now” as Eckhart Tolle would say. This is how you spend your day. Interestingly, this ability to be present on the water doesn’t mean that we “forget” our problems or our stresses. Quite the opposite. It allows us to process them. You see, as we focus on the indicator in the current waiting for it to dip under the surface, our mind is free. In this mental freedom, provided courtesy of the river, our mind begins to “put away” our problems and stresses by working through them. It’s almost akin to a dream state where you’re not quite asleep but not quite awake either. Our mind is free to wander, process, think, grieve, feel, let go, settle, and so much more. When we’re on the water, we don’t count the minutes or seconds until the next task, break, meeting, delivery, etc. Instead, we are simply present for each drift, set, roll cast, double haul, or strip of a streamer. Throughout the day, we will look up to the sky from time to time. We do this often to admire a bird or just simply feel the warmth of the sun on our faces. This is the river’s way of allowing us to process and let go of our every-day worries. Think of how our world has changed over the last 20 years. Cell phones used to just be for phone calls. If you wanted to reach someone, you often had to leave a message on a home answering machine for the entire family. Email was novel and only viewed during certain times or on specific days. There was no tagging, tweeting, friending, or instant messaging. We had to connect to the world if we wanted information. Now, the world connects to us. We are constantly being bombarded with information. Whether it’s social, work, good, or bad, we get it almost 24/7. I was once told by an old and wise woman that our body doesn’t recognize stress as good or bad, just as stress. If you’ve been through a wedding or have kids, you know that “good stress” is still stress. So, what does all this have to do with fly fishing? Fly fishing, like few other activities in life, has a way of forcing you to disconnect and unplug. It forces you to be present because you don't want to miss that strike, especially if that was your chance at the fish of a lifetime. I would argue that this is even different than other types of fishing such as, let’s say, lake fishing (which I’ve done a lot of as well). With fly fishing, you can’t just cast and wait. Absolutely not! You have to mend, watch, mind your management loop, mend again, mind your rod tip location, mind your footing, strip line in, reverse mend, set, lift, and cast. That’s just one drift! There’s no time in there for anything else! Yet, your mind in the background, perhaps even your subconscious, will start “putting away” your problems and stresses of our very busy lives. Note that I didn’t even mention setting, hooking, fighting, and landing a fish; doesn’t get much more present than that. So, next time you’re on the water, take a deep breath, feel the water rushing around you, hear the sounds of the birds, and just be present. Enjoy this ancient craft as a way of finding calm and destressing your modern life.